Subtotal $0.00
Resources
5 Easy Steps to Building a Single End Brace
 |
|
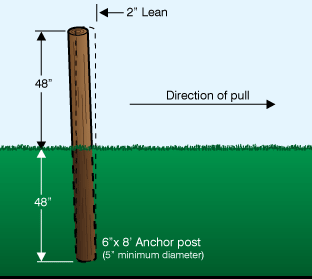
DRIVING THE ANCHOR POST
When driving your anchor post, lean it the opposite direction of the pull of the line wires. |
 |
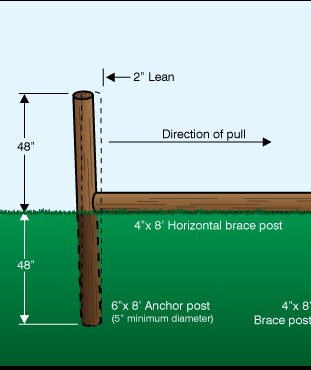 |
BRACE POST SPACING Layout your 4” x 8’ horizontal brace post (must be a minimum of 8’, 10' length is ideal) as a distance guide and mark the spot. This is where the second brace post should be driven. |
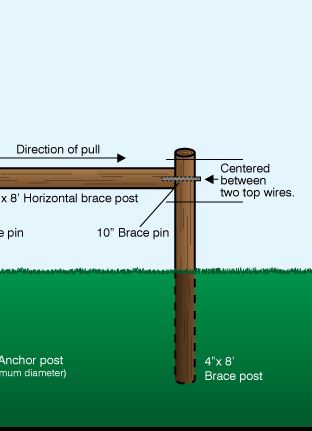
BRACE PINS & HORIZONTAL POST The horizontal brace must be located between 36” and 42” from the ground. Preferably between the top two wires. Drill a 3/8“ hole into the anchor post approx. 2½” and insert a 5” brace pin. Then drill into the end of the horizontal post approx. 4”. The horizontal can be slid onto the 5” brace pin. While holding the horizontal post up drill completely through the second brace post and into the horizontal. Drive the 10” brace pin through the second brace post and into the horizontal. Leave about 2” exposed to anchor the brace wire. |
 |
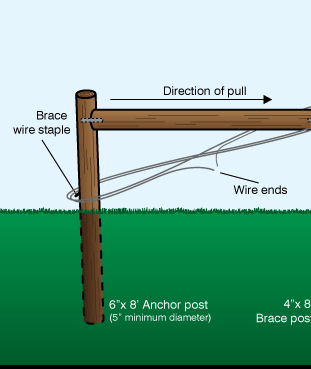 |
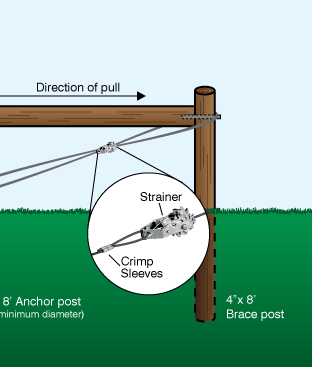
BRACING WIRE Drive a staple 2” above ground leaving 1/2 inch sticking out of the anchor post to hold the brace wire in place. Then using 12½ gauge wire make 2 complete wraps in a figure eight from the bottom of the anchor post to the top of the second brace post. |
CRIMP & STRAINER PLACEMENT To tighten the brace wire, first remove all slack from wire. Then attach one end to the strainer with 2 crimp sleeves (shown in illustration). Insert the other wire end into the hole in the cog and use a strainer handle to tighten and remove the rest of the slack from the brace wire. |
 |


